Lately I’ve gone 100% DIY and now I’m producing, mixing and mastering myself. Here is a quick peek at how I process my drum bus.
I work primarily in Ableton, and most of the time I just use the stock drum plugin and drag and drop samples in. I actually use a single lane for each drum type. So I will have one for kick, snare, claps, toms, hats, crashes, and possibly a few for extra percussion. All of these are then joined into a drum bus. Its a fairly simple setup and I don’t use any parallel busses or anything, just 1 bus going straight to master.
The first step in drum mixing in my workflow is balance between kick and snare. I add hats, then percussion after that. I see a lot of posts about what level kick and snare should be, but in my opinion you can’t put a number to it. The reason is that every kick and every snare is completely different. Some are long, some short, some have more low end, others more high end. In my opinion you just need to sound it out. There are other methods of doing this where the kick goes outside the drum bus, but I like grouping all percussion instruments into a single bus.
Drum Bus Plugins
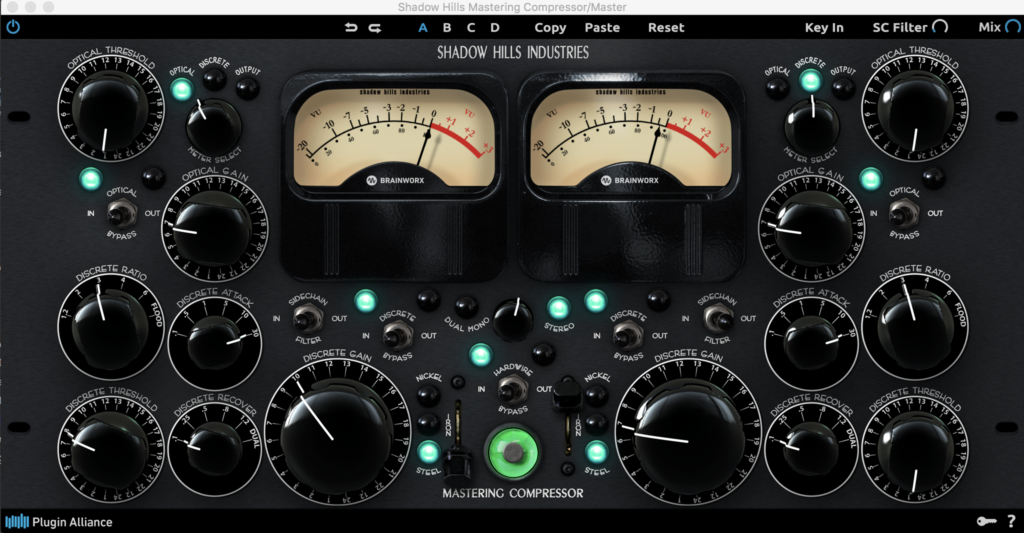
My 2 main buss plugins are Shadow Hills Mastering Compressor and Standard Clip. For the compressor I usually have the side chain to filter out low frequencies turned on. I usually keep the attack all the way slow. I have the release knob usually on the slowest or second slowest setting.
Clipping With Ducking
The soft clipper will just cut off the peaks of the percussion, usually the kick and snare peaks together. So what I try to do is contain the peaks of the drums with the clipper, and use ducking on other tracks to retain the illusion of dynamics. So if I clip 3db off the kick for example, I would duck at least 3 more db from the other tracks so that it still sounds like the kick is towering over the other instruments, even though its not.
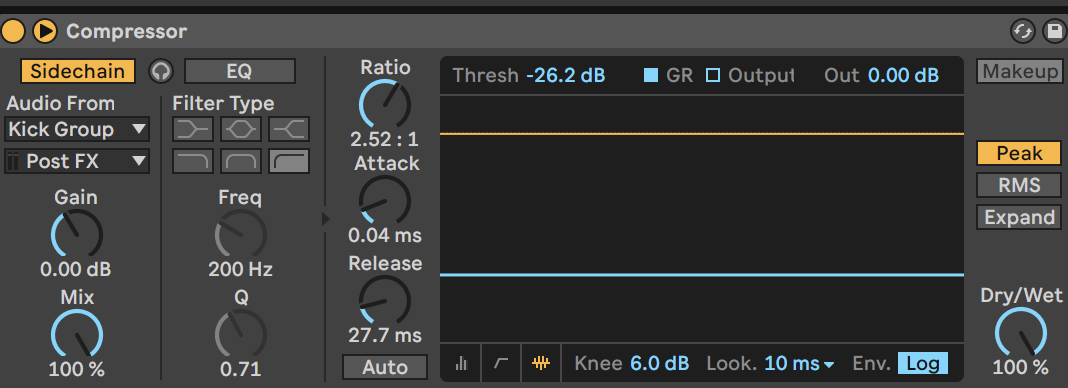
I’ll make another post on different specially types of ducking I use, but my bread and butter method is just the stock compressor. Once again, its impossible to know the exact attack and release settings because it will depend on the kick and the bass, but I typically put this on most tracks. I try to get the attack down as low as I can without getting click sounds, and I adjust the release to shape the sound of the pump. I’ll set it quick if I want it to be more transparent, and slow if I want more of a volume dip. I usually have the look ahead all the way up, and ratio between 2 and 4
